 Tuning a bass guitar can seem a bit complicated at first.
But trust me, you’ll get the hang of it in no time.
Once you know how to tune a bass guitar, it becomes easy.
And the step-by-step guide below will get you there.
I do recommend using a tuner or a tuning app.
Two of the best apps are free, so you don’t even need to buy anything. I have links below.
Keep reading for those links, and for a detailed step-by-step guide that will make tuning your bass a quick and easy process. We also briefly cover drop C and drop D tuning, in addition to standard bass tuning.
Table of Contents
- 1 How To Tune A Bass Guitar
- 2 Bass Guitar Standard Tuning
- 3 Bass Guitar Drop C Tuning
- 4 Bass Guitar Drop D Tuning
- 5 Bass Guitar Tuning: Final Thoughts
How To Tune A Bass Guitar
As mentioned, I recommend using an app or a physical tuner. At least at first. It’s just more accurate that way. Tuners are cheap and many apps, including two of the best, are free.
We’ll start there and then get into the actual tuning below. Of course, if you just got your bass, you may want to do a proper bass guitar setup before you tune the strings.
Materials & Tools Needed
You don’t technically need anything to tune your bass guitar, apart from the instrument itself and your fingers and ears. But a tuner will make the job much easier (and generally more accurate, too).
A Physical Tuner Or A Tuner App
It is perfectly possible to tune a bass guitar without any form of tuner as a helping tool. However, everyone uses tuners, because they’re more accurate than our ears. If you haven’t bought one yet, either purchase a basic clip-on tuner or download a tuner app on your smartphone.
Option 1: Physical Tuner
We’ll dive deeper into the details of how to use a tuner in the sections below. For starters, let’s get you one. You can buy a physical tuner for as little as $10 to $15 online on sites like Amazon and eBay, or in your local music store.
The simplest and cheapest tuners are usually all-purpose helpers, meaning that they’re designed for guitars, but can be used on any stringed instrument.
If you want to make the tuning process a little easier, I recommend a dedicated bass tuner like D’Addario Bass Tuner. It was purposefully built for 4-string instruments like bass and cello, plus it’s fairly affordable.
More advanced tuners cost about $10 $15 extra, but usually feature convenient functions like an inbuilt metronome and the ability to switch between 6-string and 4-string tuners with a tap of a button. Wegrower’s DU-M40 is a good example.
Option 2: Tuner App
Some musicians argue that tuner apps aren’t as effective as physical tuners. That’s not necessarily the case, at least not if we’re talking about apps designed by big players like Fender or Roland.
And those brands make the two apps I mainly use and can recommend: Fender’s Guitar Tuner and Roland’s Boss Tuner (built after its TU-3 pedal).
Since both of them are exceptional and free to download & use, I don’t see any reasons why anyone would pay for a bass tuning app. Tuners like TonalEnergy or Strobe Tuner Pro add a bit of value by integrating more advanced metronomes and utility features, but you’ll be perfectly fine with a free tuner.
Optional: A Set of Bass Strings (If You’re Also Restringing Your Bass)
I can’t even count how many times I attempted to tune my first bass, only to discover that the strings wouldn’t stay in tune for long. This is usually the case when the strings haven’t been restrung in a while, if they’re poorly made, or both.
If you’re trying to tune your bass with little luck, restringing your bass first might solve this problem. Bass strings vary in size, thickness, weight, durability, tone, feel, and a host of other factors.
I’ll probably make an entire article dedicated to understanding the main elements of bass strings someday, but for today, I’ll briefly cover what you need to know when purchasing a set for your first re-stringing.
Many beginners choose to buy bass bundles, which usually contain at least one replacement string set. These strings are typically the same as the ones that your bass was pre-strung with, but they’re new, meaning they’re automatically better. If you’re out of cash and your bass doesn’t sound right, these free replacement strings will do the trick.
If you’re somewhat experienced but don’t have any particular preferences about bass strings, just get the size right. The size of bass strings is determined by their length and thickness (gauge).
The length of the strings you should buy is usually determined by the scale length of your bass. For example, if your bass has a scale length of 32 inches, you should get strings that are at least 35.25 inches long.
When it comes to the string gauge, thicker strings are better for lower tunings and are a bit easier to slap & pop, but they’re also more difficult to play, especially if you’re playing with your fingers.
Step 1: Attach The Tuner To Your Bass Or Open The Tuner App
To ensure that you accurately tune your bass, I definitely recommend using a tuner or a tuner app. If you have a physical tuner, attach it to your bass guitar’s headstock. Alternatively, just open the tuner app on your phone.
Assuming that you want to tune your bass to Standard E tuning (E-A-D-G), you should first check if that’s the default tuning on your tuner or app.
If not, nearly all tuners have buttons with arrow symbols that allow you to modify the tuning parameters. Better tuners enable you to change the entire tuning in half-step increments, while all tuners allow you to change the tuning string by string.
If you are using a tuner app, it needs to be as close to your bass guitar’s strings as possible. Tuner apps use your phone’s built-in microphone to pick up vibrations. As a result, the closer the phone, the higher the accuracy.
Step 2: Pluck the Strings So The Tuner Can Read The Vibrations
All tuners work in a fairly simple way – you pluck the string, and the tuner’s software picks up the vibrations, processes them, and gives you a reading in just a few seconds.
The traditional way of tuning a bass guitar is from the E string (the lowest and thickest string on your bass) upward. Whether you’re using your fingers or a pick is irrelevant, but you’ll need to pluck the string with enough force so the tuner can properly read the vibrations.
As a rule of thumb, if the arrow on the tuner’s display isn’t moving at all, you’re plucking the string too softly. If it’s moving too much, you’re plucking the string too strongly. Experiment a bit until you’ve found the right balance.
Step 3: Read the Tuner
By now, your tuner should start showing you the most important parameter: which note the string you’ve plucked is in. More advanced tuners also show parameters like note frequency, whether the note is sharp or flat, and so on.
The two most important things you’ll need to learn to read are the note indicator and the arrow pointer.
The note indicator is a letter that changes as the arrow moves. You’ll notice that as the string vibrates, the letter will change from, for instance, “E” to “D#” or “F”.
When tuning the lowest string, the indicator will display “D#” when the string is lower than it should be. The opposite is true when the indicator reads “F”.
Knowing a bit of music theory and the names of the bass notes can come in handy, but you’ll be perfectly fine as long as you understand that you’re tuning your bass to E-A-D-G. Here’s a quick tip about the notes you’re looking for and their adjacent counterparts:
- 1st string E: the lower note is D#; the higher note is F
- 2nd string A: the lower note is G#; the higher note is A#
- 3rd string D: the lower note is C#; the higher note is D#
- 4th string G: the lower note is F#; the higher note is G#
Step 4: Using The Tuning Pegs
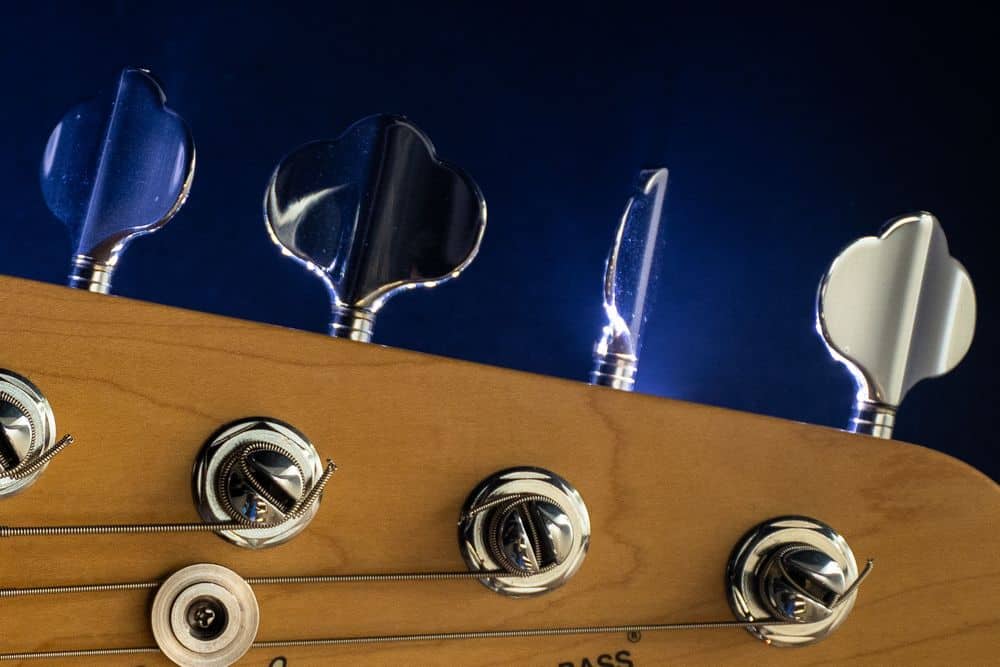
The tuning pegs, machine pegs, or machine heads are all the same part of a bass guitar. They are just different terms that can be used interchangeably.
They’re metal, brass, or bronze pieces on your bass guitar’s headstock that are designed to not only tune the strings, but also keep them tightly in place.
If they’re set up properly, the tuning pegs should tighten the string if turned clockwise, and loosen it if turned counter-clockwise.
One of the most important things I’ve learned as a beginner is to use the tuning pegs very slowly and softly. Even though you may feel the need to simply loosen a string quickly, especially when restringing or dropping to, say Standard C or Standard B, do it slowly, so that the string doesn’t snap and detune your other strings. This is especially important when tuning up.
Tightening the string means to turn the pegs clockwise. When you do it, the arrow on your tuner should be going to the right. You’ll note that as soon as you pass a certain mark (and enter the “region” of the next note), the arrow will fall back to the far left.
The same is true in the opposite direction. When loosening the string, the arrow will start falling to the left and revert to the far right when you’ve dropped the tuning half a note.
Step 5: Finding The Sweet Spot
Fretted basses use frets to evenly divide the entire octave. Although they can produce a fixed number of notes (unlike fretless basses), there are several pitches that are too similar for untrained ears to discern on each fret.
You can’t play them on a fretted bass, but you can tune the instrument in one of these pitches, if you don’t find the sweet spot for each string.
In simpler terms, simply locating the notes E, A, D, and G won’t suffice. You’ll need to learn how to read the arrow indicator and use it to fine-tune each string so that it’s in the prescribed zone.
Each tuner has a half-circle display (digital or analog, it doesn’t matter). The sweet spot is in the very center of this display. Imagine each pip away from the center as a -10 or +10 number.
It’s fine if you can’t tune each string to perfection, but it shouldn’t stray more than -15 or +15. Even though you won’t drop an entire note by tuning E to -20, you’ll tune it to a pitch that will make your bass sound like it is out of tune.
Bass Guitar Standard Tuning
The guide above was for the standard bass guitar tuning. That means tuning the strings to the notes E, A, D, G. If you have a 5-string bass instead of a 4-string, standard tuning is B, E, A, D, G.
Bass Guitar Drop C Tuning
In order to tune your bass to drop C, you want to tune the strings to C, G, C, F for 4-string basses, and C, G, C, F, A for 5-string basses. Apart from the different notes on the strings, everything else is the same. Just make sure your tuner or app is set to drop C.
Of course, drop C tuning can also mean that you only “drop” the E string to “C” and leave all other strings the same. In that case, you tune the strings to C, A, D, G. You’ll find some disagreement as to which of these two tunings is drop C. The truth is, they are both called that.
Bass Guitar Drop D Tuning
When it comes to drop D tuning, there is no disagreement. You tune the E string down to D and leave the rest the same. That means you tune the strings to D, A, D, G. Remember to select this tuning on your app or tuner.
Bass Guitar Tuning: Final Thoughts
Once you know how to tune a bass guitar, the process becomes quick and easy. I always recommend using a tuner of some type. Not only does it make tuning your bass faster, it also ensures accuracy.
Personally, I have both a clip on tuner and an app on my phone (I have used both the apps I recommend, but currently use the Fender one). A simple clip-on tuner is inexpensive and easily worth the cost.
But if you prefer not to spend any additional money, the two apps I recommend work just as well and cost nothing. You just have to make sure you get the phone close enough to the strings.
If you find that your instrument keeps going out of tune, there are a number of possible issues. The simplest may just be that the tuners or the saddle are dirty. If that is the case, read our article on the best way to clean a bass guitar.


Leave a Reply