 It can be a pain, I know.
Cleaning an acoustic guitar takes a considerable amount of time and effort.
But that’s it. It’s not difficult. It just takes time.
And you don’t have to do it often.
If you play your guitar regularly, we recommend giving it a thorough clean twice a year.
What does a thorough clean entail?
Keep reading to learn exactly how to clean an acoustic guitar. We will take you through the entire process step by step.
How To Clean An Acoustic Guitar
Before we get into the actual cleaning process we want to make sure you have all of the materials you will need. Many of them are thing you probably already have lying around the house.
What You’ll Need
Before you jump into the process, we should first cover the materials you’ll need. Cleaning your acoustic guitar isn’t difficult, despite what you might think.
However, the process is much simpler and more effective, if you have the right tools and materials. The easiest way to get what you need is to buy a complete guitar cleaning kit. This one is our favorite:

Also, it’s usually best to do all the cleaning when you’re planning to restring your guitar anyway. Might as well combine the two tasks. Here is what you will need, if you prefer to buy items individually.
- a soft wiping cloth
- regular guitar polish (this is our favorite brand)
- lemon oil (not real lemon oil; it’s the common name of this fretboard cleaner)
- a small brush (which could be a toothbrush)
- a soft brush
Instead of a brush, you can perhaps use anything small and pointy, like a needle. You just need something you can use to clean around the fret wires.
Cleaning Your Acoustic Guitar
And now, let’s take this one step at a time. Simply follow along with the following steps. They work for all types of acoustic guitars.
Step 1: Remove The Strings
If you want a thorough cleaning, you need to remove the strings. That’s why we mentioned combining restringing and cleaning above.
There’s no way to clean your guitar properly with the strings on. You can do it to some extent, but you won’t get it completely clean. Nevertheless, we will cover that later.
Step 2: Removing Dust And Other Residue
To remove dust, take a soft cloth and gently wipe down the entire guitar, including the body, neck, and headstock. Pay extra attention to the areas around the soundhole and the strings, because these areas tend to collect dust quickly.
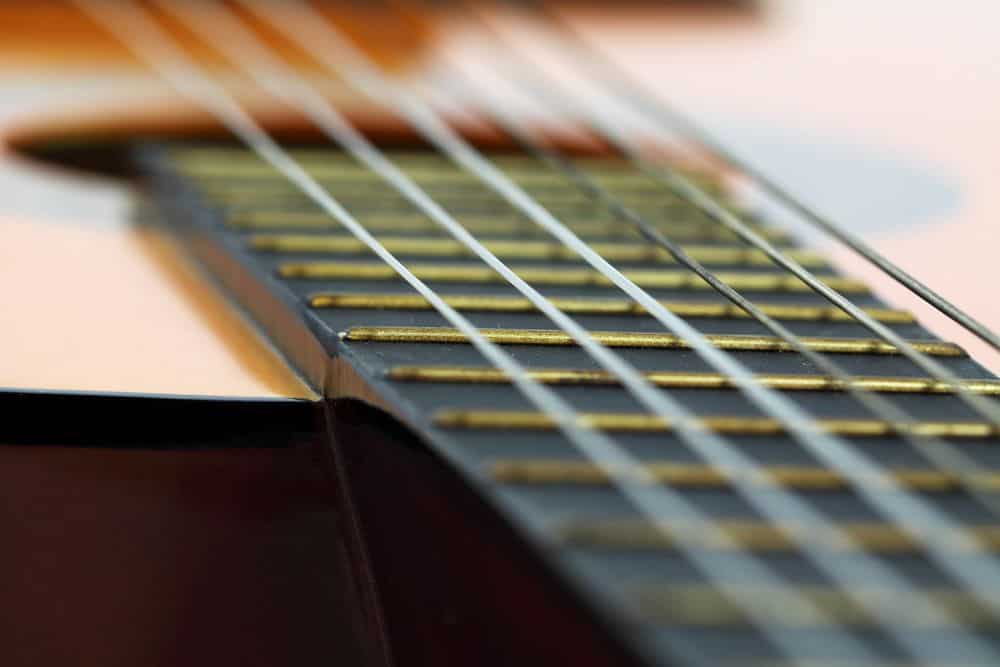
Next, use a small brush, like a toothbrush, to get into tight spaces and crevices. Pay special attention to fret wires and where they touch the fingerboard. Of course, don’t go too hard in there. You don’t want to potentially damage the finish of the fingerboard.
Overall, be gentle but thorough. You want to remove all of the dust and loosen up all of the residue on the fingerboard. Do the same with the bridge.
You also want to remove all of the bridge pins and brush them as well. Move up to the headstock and pay some attention to where the tuning machines meet the wood.
The same goes for any other crevasses and tight spots, like the nut where it meets the neck and the headstock, the bridge, and all around the pickguard, if your guitar has one.
Step 3: Perform A Thorough Cleaning
For the thorough cleaning, use a guitar polish to clean the body and neck of the guitar. Apply just a small amount of the polish or oil to a soft cloth and gently rub it into the body.
Use a soft-bristled brush to remove any dirt or grime that may have accumulated in the crevices. Then move over to the fretboard and rub in the lemon oil with a cloth using a circular motion.
Again, I want to point out that this isn’t actual lemon oil. It’s the widely accepted name for a guitar care product used on fingerboards.
In particular, you’ll want to clean around the fret wire. You’ll notice the gunk from sweat and skin residue and that’s where you’ll want to scrub. Just be careful not to damage anything.
Here’s where a needle, or anything sharp, will come in handy. We just suggest that you be extra careful and put a cloth over the needle. If you want to clean using the needle or any other pointy object alone, do it very slowly and with extra care and patience.
After that, move over to the bridge and the headstock. You can also use a brush or a sharp object and gently remove all the dust and other residue.
At the same time, it would also be a good idea to check on the structural integrity of the instrument. Make sure that everything is where it should be and glued properly. Also, check all the frets and see if they’re in good condition.

This part of the cleaning process is the best moment to check if there are any potential issues. If you see any, contact a luthier as soon as possible. Or, if it’s a very cheap guitar with no particular sentimental value, you can consider buying a new one.
You can also use some detergent or soap, if your instrument is especially dirty. If you don’t have any detergent, use just water. Just make sure you don’t get your guitar too wet, no matter which way you go.
The best option is to make a very mild solution of detergent in water and use a simple sprayer to apply just a dash of it directly on the instrument. Do this right after the initial dusting step and make sure that you remove all the liquid after cleaning.
I want to emphasize that you should never use an alcohol-based cleaning product on your guitar. It can ruin the finish and even damage the wood itself.
Step 3: Wrap It Up
Once you’re all done with the steps, you can use an additional polish treatment and a buff cloth. In this step, it’s also important to remove any excess oil or other materials that you used in previous steps. Use a circular motion to effectively remove any smudges.
Since your guitar is super-clean now, this would be a good time to also check your finish for any damage. While you’re at it, check the fingerboard thoroughly, too. It can hide some unwanted cracks.

After that, it’s time for restringing. Of course, you could also just put your old strings back, but we wouldn’t recommend that. You already have them off, why not take the opportunity to replace them? IF you do put the old ones back on, you’ll have to clean those strings, too.
Can You Clean Your Acoustic Guitar Without Removing The Strings?
Yes, you can do some minor cleaning without removing the strings. You could just loosen them up a little and remove dust and other residue. There are also certain methods and tools for cleaning your guitar without removing the strings.
However, we highly recommend that you go all the way at least two times per year, if you’re playing your instrument daily. A good acoustic guitar costs money, so treat it like it’s valuable. Because instruments from the best brands of acoustic guitars are valuable.
Cleaning An Acoustic Guitar: Final Thoughts
That wasn’t so hard, was it? As we promised in the beginning, cleaning your acoustic guitar is not difficult. It just takes time.
And now that you know how to clean an acoustic guitar and you have gone through the entire process once, the next time you do it will go more quickly. Even better, the next time you do it probably won’t be for at least 6 months, unless you really dirty up your instrument.
Leave a Reply